FiveM from A to Z
FiveM - All in One
This guide presents all the steps from start to finish for installing the FiveM service on a Linux server.
Read each point and all the information it contains carefully. If you follow all instructions exactly, the server will work. If you plan only to copy and paste commands without understanding, don’t be surprised if something doesn’t work.
Purchasing a Server
If you haven't bought a server yet, you are probably wondering which server will suit you best. You might want to ask us which server is best for your server — "so that it can support X players."
The answer is simple: you have to know this yourself. We don’t have a crystal ball that can tell us what you have on your server or its condition. A 100 PLN server may support 150 players or may have trouble with just 20.
Server Types
On our hosting, you have access to 3 server types:
Each is different, has a different price, and is intended for different uses. For game servers (like FiveM or Minecraft), we recommend VDS servers, which have dedicated resources and stronger CPUs. VPS servers do not perform optimally under demanding workloads. A dedicated server might be your choice when you already know your server is very demanding, has many players, and you have the skills and awareness that managing a dedicated server is more error-prone. Dedicated servers do not have full system backups we can restore, your server won't be visible in our panel, and it requires more knowledge. If this is your first VPS-type server, stay with the VDS offer.
System
Once you have purchased your server, it’s time to choose the OS on which to install FiveM. Our panel offers several options ready to install:
- Debian
- Ubuntu
- CentOS
- Fedora
Which one to choose for a FiveM server? To simplify installation, we prepared an installer that works on Debian and Ubuntu systems, so we will stick to these.
Debian is the "parent" of Ubuntu — they work very similarly, but Ubuntu has more pre-installed packages. The key difference for us is the database server installed by our installer. On Debian, it's MariaDB, and on Ubuntu, it's MySQL. Keep this in mind if you use "ready packages." Open your .sql file and check if it was prepared for MySQL or MariaDB. It will be one of those two.
In this guide, we will use Debian 11.
Installation
SSH Login
Since we have chosen our system, we must wait for the server installation to complete. Use the SSH Login Guide and connect to SSH.
Installer
Terminal-style Guide
Save your login credentials carefully.
The video allows copying text from the Terminal.
Traditional Guide
- Expand to use the traditional guide.
As mentioned earlier, our servers have an installer that speeds up the FiveM service installation process. Now we will use it.
In SSH, run the command:
skillhost
At this point, one of two things will happen — either the installer will appear, or an error will show. If an error appears, this highlights the difference between Debian and Ubuntu mentioned before. Debian has fewer pre-installed programs, so you may need to install missing tools. In our case, only the curl tool is missing. Install it with:
apt install -y curl
After installing curl, rerun:
skillhost
The installer should now be visible. Read its contents carefully.
You will see four options available:
- FiveM
- MySQL + Apache + PHP + PHPMyAdmin
- Docker & Aplikacje
- Pterodactyl Panel & Wings
We'll install the database first, then FiveM.
Installing the database:
Choosing option 2, to install MySQL + Apache + PHP + PHPMyAdmin, you will get:
- A link to the PHPMyAdmin panel
- Username
- Password
These 3 items are very important. Save them.
Then, restart the installer by running skillhost and select 1. FiveM.
Install FiveM + txAdmin (option 1 in the FiveM menu). After installation, you will receive connection data. Save them carefully!
- User
- Port
- Password
These are your SFTP credentials for file transfers.
- Address
- Code
These are the TxAdmin panel access link and the admin registration PIN.
If the PIN did not appear:
On the cheapest VDS servers, and sometimes on VPS servers, this may happen. In this case, run:
service fivem restart
Then check the logs with:
tail -n200 /var/log/syslog
Look through the output to find the PIN.
TxAdmin Configuration
In the previous step, you received the URL for the txAdmin panel. Open it in your browser and enter the code you received. Next, you need to create an account or log in on the CFXRe platform (required by FiveM). After this, you should be redirected back to txAdmin. Click Continue.
Now txAdmin will ask you to create a Master Administrator account. Fill in the required details.
The main page will show the configuration menu.
- Confirm profile configuration by clicking „Next”.

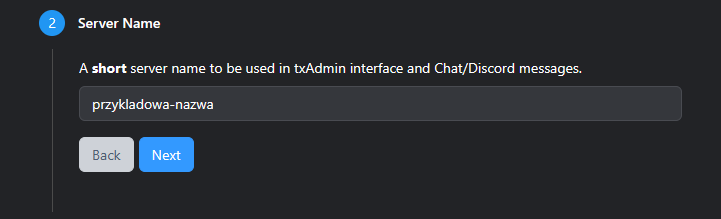
- Enter the server name to use in logs, messages, etc., then click „Next”.
- You will see a choice of installation types:
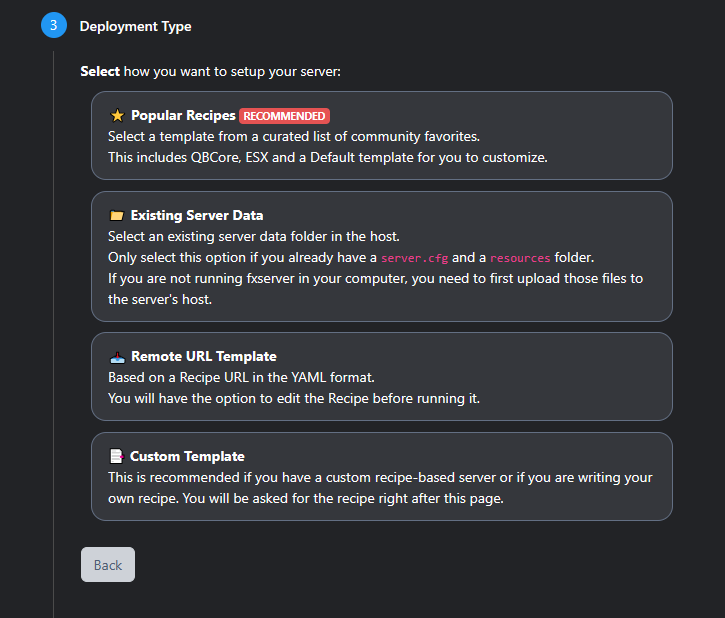
- Existing Server Data
- Enter
/home/fivem/and save.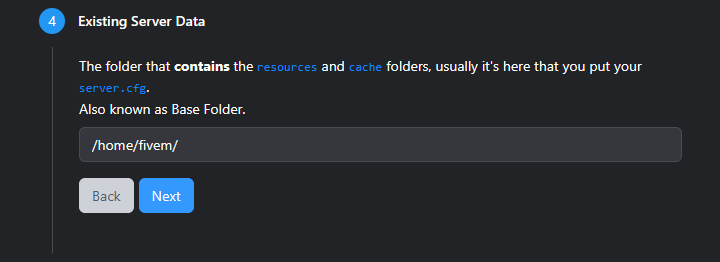
- Popular Recipes.
Documentation in progress.
Uploading Files
Depending on the chosen scenario, your files will be located in different directories:
- Existing Server Data – files are in
/home/fivem - Popular Recipes – files are in
/home/fivem/txData/...
To upload files, you need a program like WinSCP or FileZilla.
I will use WinSCP.
When you start the program, a connection window appears.
Set the Protocol to SFTP, leave Port at 22.
In the hostname field, enter your server’s IP address.
In username and password fields, enter the saved credentials from the installer, not database credentials, but your SFTP user.
After connecting, on the light blue bar on the right, you should see the location, usually /home/fivem — this is your server’s root folder. Upload your files here.
If you selected Existing Server Data during setup, place the files directly in the /home/fivem directory.
If you chose Popular Recipes, upload files to the /home/fivem/txData/ folder.