Remote Desktop
UWAGA:
Remember to configure Windows Server Network after installing the Windows Server operating system on your server — otherwise, Remote Desktop will not be available.
Remote Desktop Configuration and Connection
Remote Desktop Setup
- In the SkillHost panel, go to the „Konsola VNC” tab.
- Log in to the system and select „Server Manager”.
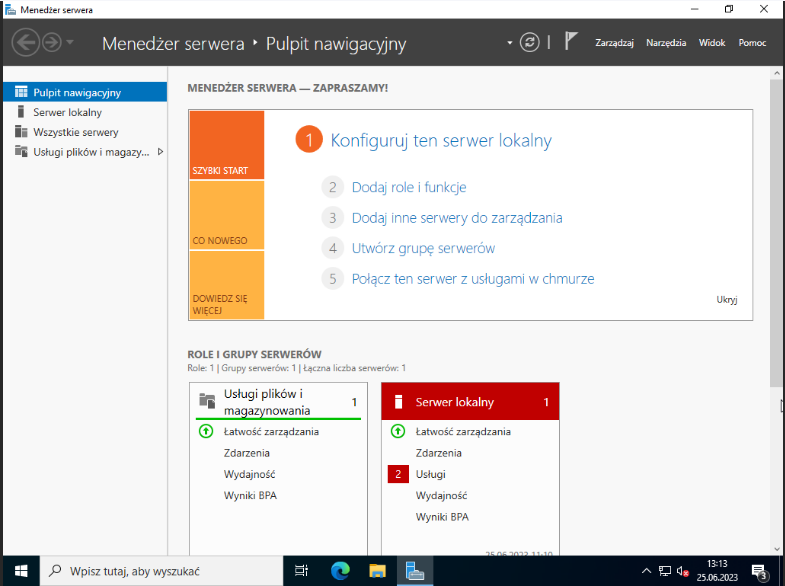
- In the left menu, choose „Local Server”, then in the main panel click on „Remote Desktop”.

- Select „Allow remote connections to this computer”, and confirm by clicking „OK” in the pop-up window.
INFORMACJA:
If you experience connection problems, enabling the option below “Allow connection only from computers running Remote Desktop with Network Level Authentication” can help resolve the issue.
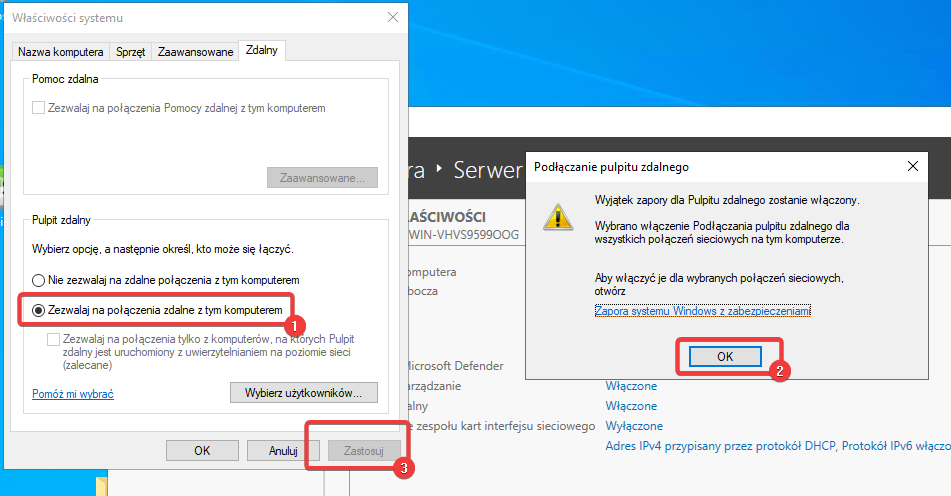
- Then click „Apply” and „OK”.
Congratulations! Your Remote Desktop is configured.
Connecting to Remote Desktop
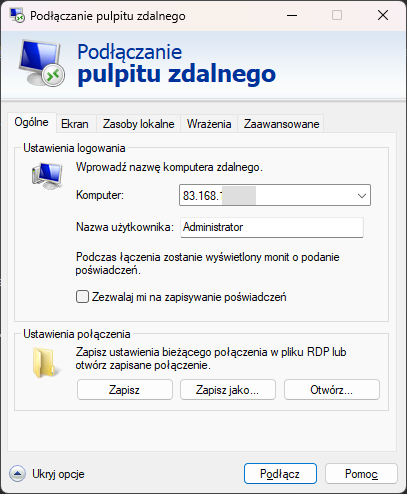
- On a Windows system, search for and open the „Remote Desktop Connection” application.

- In the Computer field, enter your server’s IP address, and in the User name field enter „Administrator”.
-
In the next window, enter the password you set during the system installation and click „OK”.
-
If a certificate warning appears, select „Yes”.
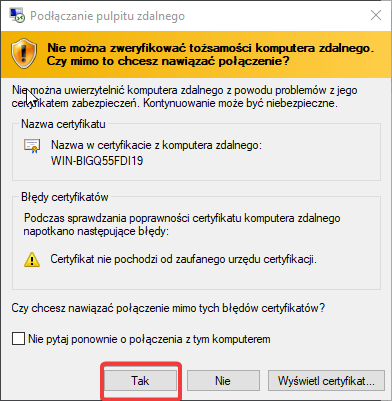
Congratulations, you are now connected to your server via Remote Desktop!