Extending Partitions in Windows Server
Wprowadzenie
Extending partitions in Windows Server can seem complex, especially when you encounter limitations of the built-in tools. This step-by-step guide will show you how to safely and effectively enlarge a selected partition — even when the “Extend Volume” option is grayed out — using Disk Management and the command line. We will also demonstrate how to safely delete a blocking partition (usually Recovery) to access free space.
Before making any changes to partitions, back up important data. All operations are performed at your own risk!
Starting GParted Disk Management Tool
- Power on your VPS server.
- Open the VNC console.
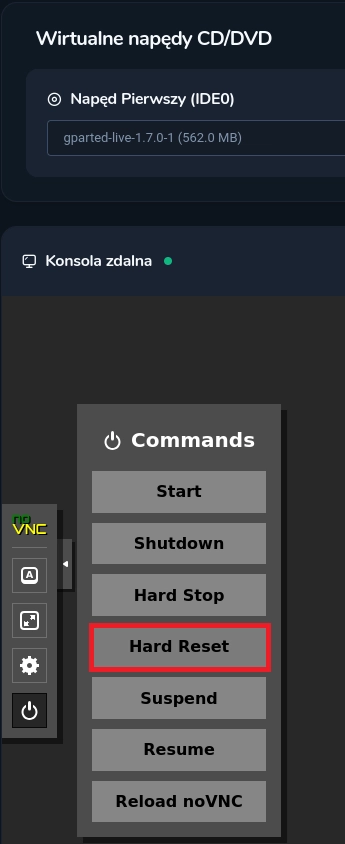
- In the „Primary Drive” option, select „GParted”

- From the console’s left menu, select the Commands tab, then click Hard Reset and confirm the popup window.
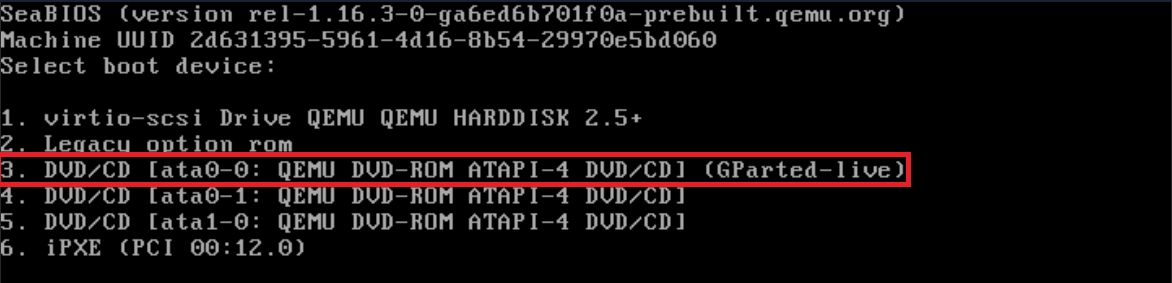
- After the Hard Reset, quickly open the side panel, select Show Extra Keys, and press the ESC key.
The ESC key must be pressed very quickly — exactly when the Proxmox logo appears on the screen. If missed, you will need to perform Hard Reset again.

- The boot menu will appear. Choose option number 3 corresponding to drive 1 (usually with the GParted Live suffix) to launch GParted.
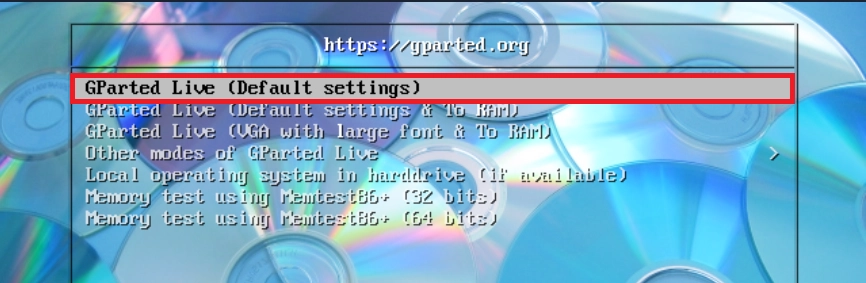
- You will be taken to GParted, select GParted Live with default settings.
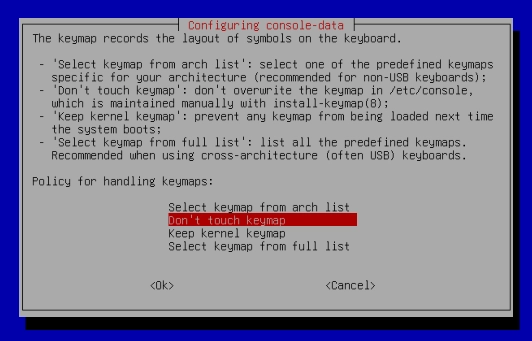
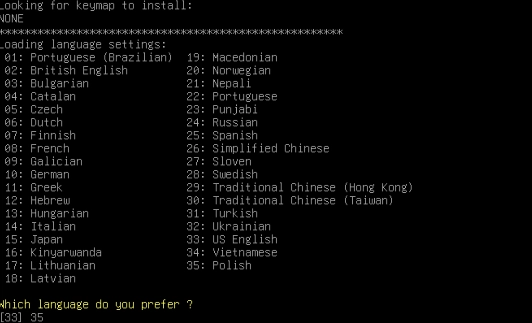
- When “Configuring console-data” appears, select “Don’t touch keymap.”
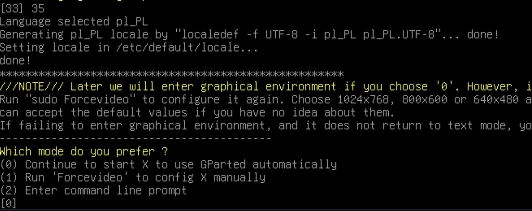
- Then select your preferred language. For Polish, enter 35.
- Select option “0”.
- A window showing all your disks including unallocated space should appear automatically.
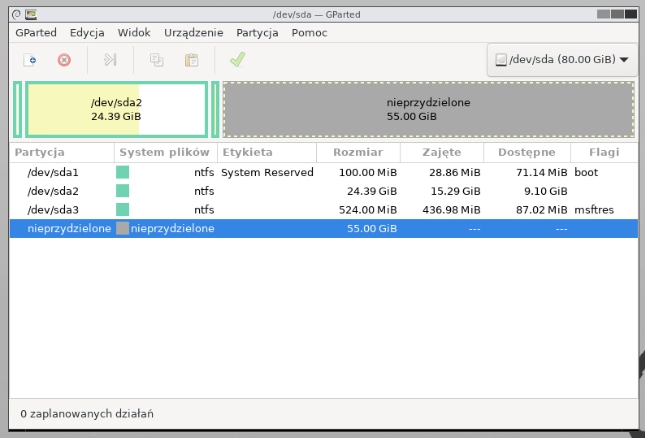
Unfortunately, there is a partition between the “unallocated” space and your system partition (usually unflagged on the right side in the app).
Therefore, the easiest, fastest, and safest method is to move this partition — let’s proceed.
Przesuwanie partycji w GParted
- Right-click on the partition between the unallocated space and the C: partition (i.e., your previous original partition size).
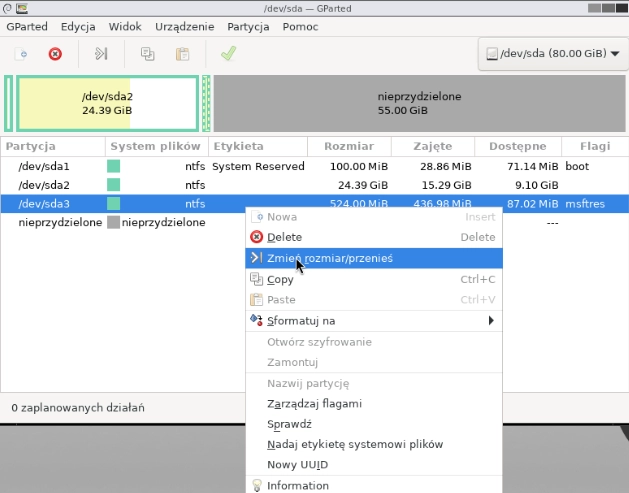
- The following menu will appear.
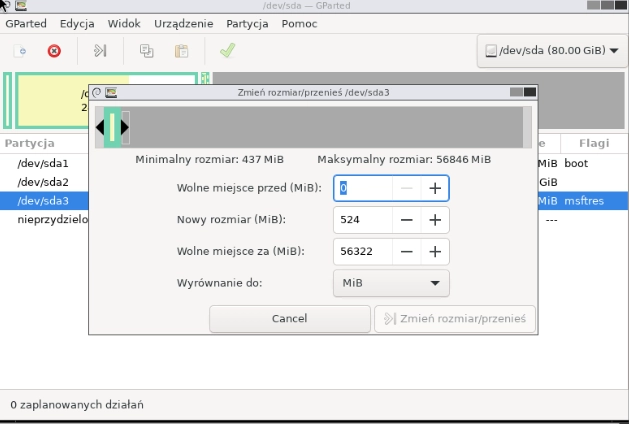
- Drag the top slider fully to the right so that “Free space following” is 0, and “Free space preceding” equals the amount you want to extend by — in this example, 56322.
It should look roughly like this:
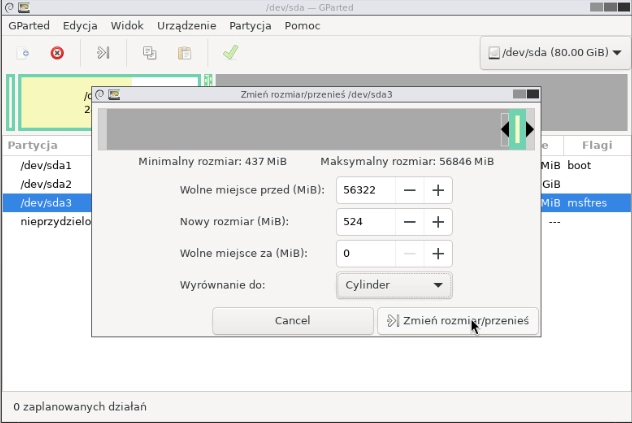
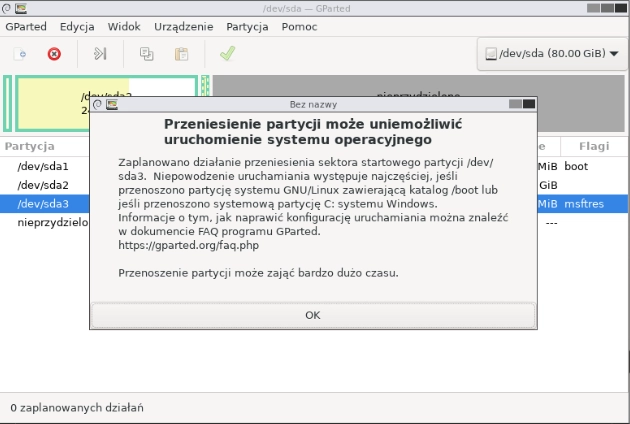
- Click “Resize/Move.” A warning dialog will appear, click OK.
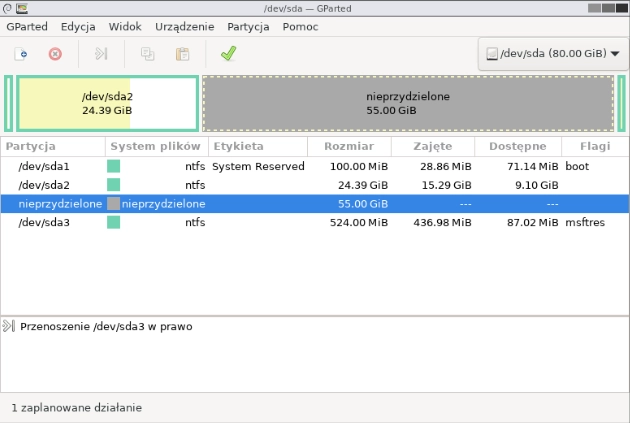
- Now the “unallocated space” should be directly after the partition.
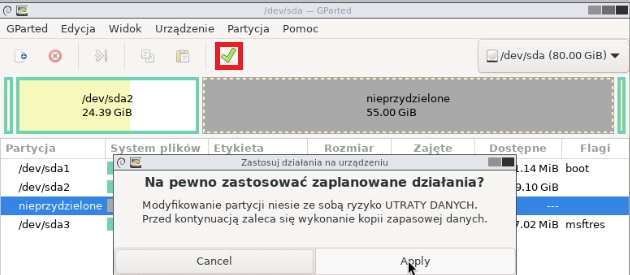
- Click the green checkmark at the top. A confirmation dialog will appear asking to apply the pending operations. Click Apply.
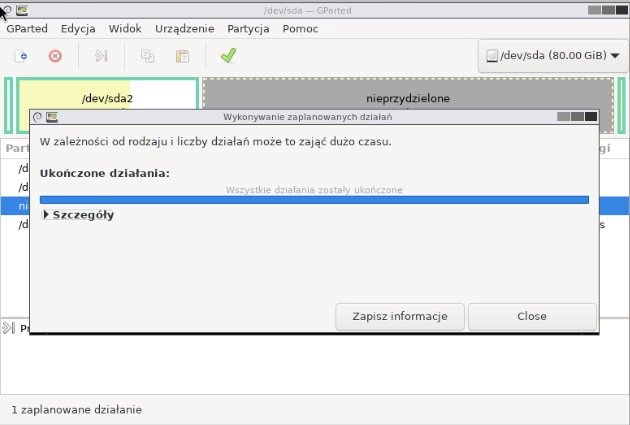
- The partition move process will start. After completion, you will see the following message.
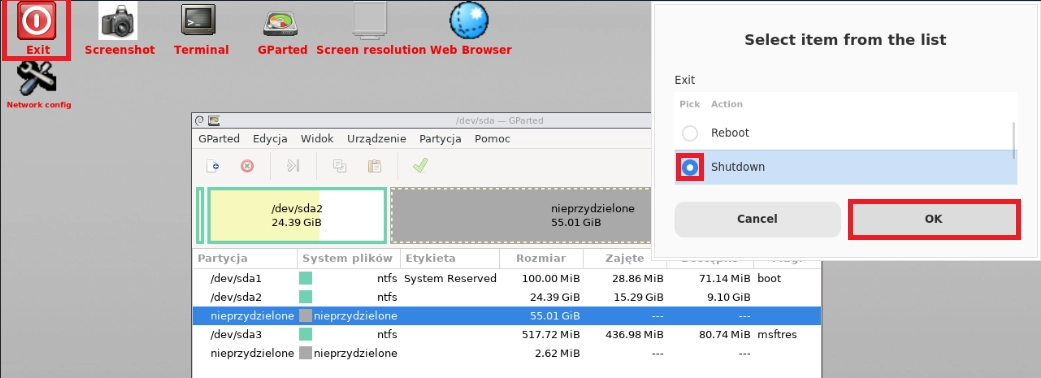
- Click “Exit” in the top-left corner, then a dialog will appear. Choose Shutdown and click OK.
- Your server should now power off. Start the server and wait for the system to boot.
Extending the Partition Directly in Windows Server
After completing all steps in GParted, proceed to extend the partition in the system.
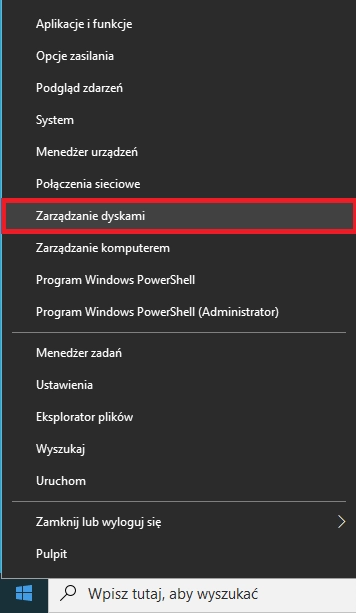
- After logging in, open the “Disk Management” app.
- Right-click on the partition you want to extend, then select “Extend Volume...”.
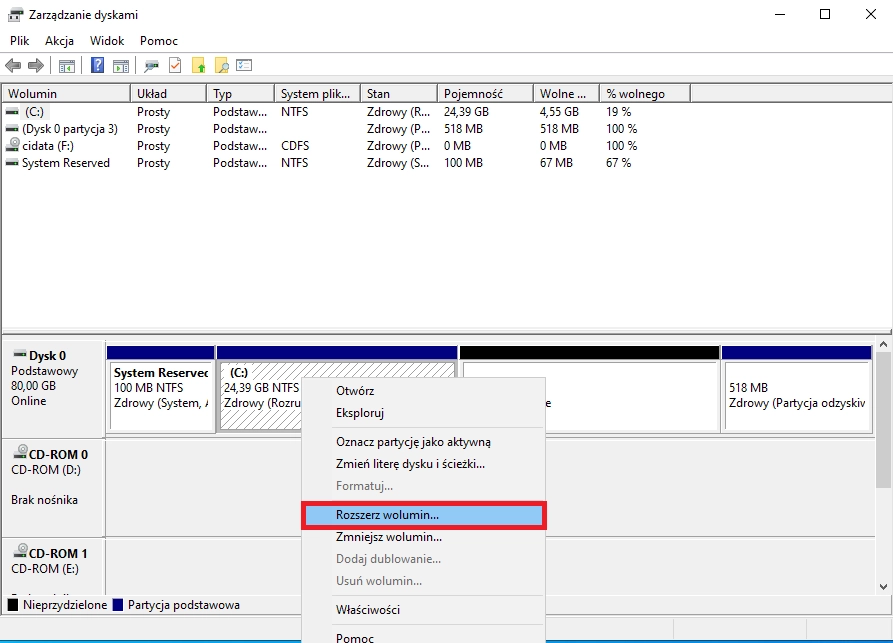
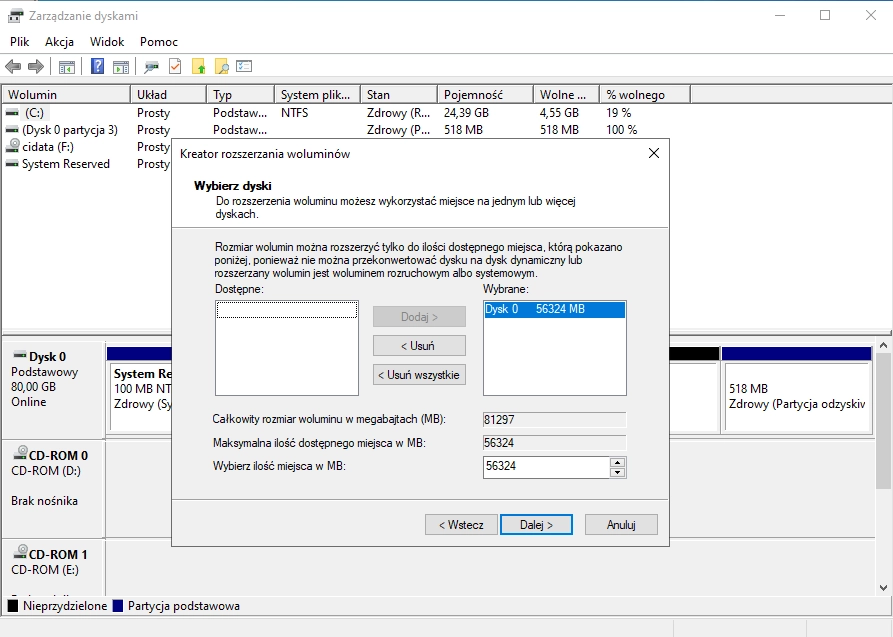
- In the “Extend Volume Wizard,” simply click “Next” twice, then “Finish.” This will increase your disk size.
- If all steps were carried out correctly, the disk will be extended.